DCU Telephony
Welcome to ISS Telephony Services.
Information Systems Services (ISS) telephony services are responsible for all telephone-related issues throughout the campus.
If you need help with, or information on any of our centralised services, please scroll to any of the sections below.
If you do not find what you are looking for, then please contact ISS directly.
Please dial 0 for an outside line.
Note when dialling external numbers, including Dublin; a county prefix is required, e.g. Dublin 01

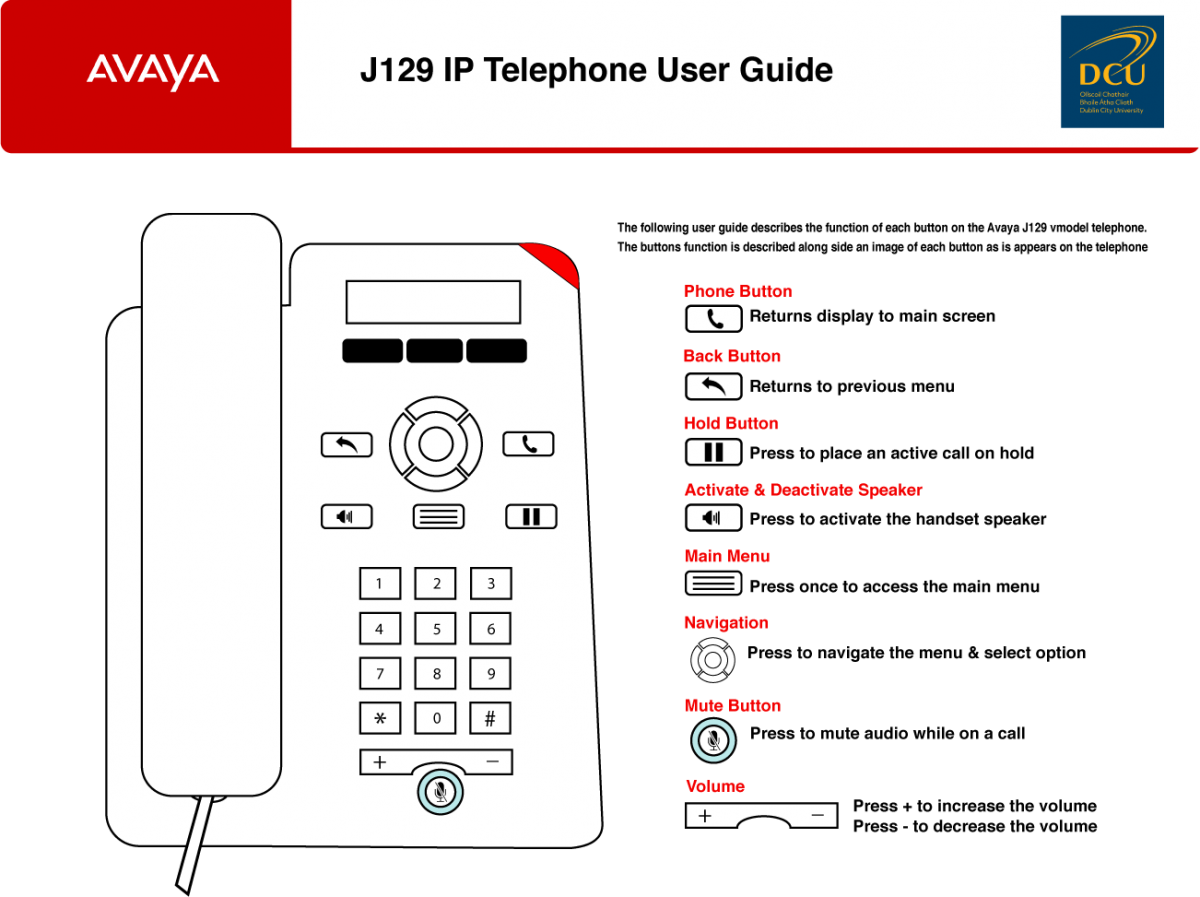
J129 Handset Login and Voicemail
- Handset should be logged in, if the screen is at the login prompt, for login use the extension number Ex. 1234 and passcode is the 8 digit PIN
- The password is set initially by the system for the handset and will not change, there is no option for the user to change this password and it will always be in the form of an 8 digit PIN code.
- This PIN will be used for the initial login to voicemail and the system will ask user to change this on the first voicemail login.
Avaya J129 Handset Login
- At the login prompt;
- Enter your extension number
- At the password prompt enter the 8 digit password (PIN Code) - hit OK or Enter
To Logout of the J129 handset
- Press the Main Menu button
- Scroll to Log Out option using the navigation keys
- Select Log out
- Press OK
Access Voicemail
- Press the Main Menu button (3 horizontal lines on it)
- Use the navigation button to scroll down to Voicemail
- Press Select (softkey 1)
- Enter voicemail password followed by #
- Enter your 8 digit PIN
- Follow the audio instructions
Accessing voicemails remotely
- To access your new voicemail inbox dial - 017009111 and follow the audio instructions
Transfer active call to another phone number
- While on a call, the option to transfer will be displayed above softkey 3.
- Press Transfer (softkey 3)
- Enter the number to transfer to
- Press Call (softkey 1)
- Press Complete (softkey 1)
Forward calls to another phone
- Press the Main Menu button
- Use the navigation button to scroll down to Features
- Press Select (softkey 1)
- Call fwd should be displayed
- Press Select (softkey 1)
- Enter the number to be forwarded to include 0 for outside line if forwarding to a mobile phone
- Press Enter (softkey 1)
- The display will show Call Forward symbol
Clear forward (from above)
- Press the Main Menu button
- Use the Navigation button to scroll down to features
- Press Select (softkey 1)
- Call fwd will be displayed on the screen, with the number and a button filled in
- Press Select (softkey 1) to switch off, (symbol will change to radio button off)
Forward calls to voicemail
- Press the Main Menu button
- Use the navigation button to scroll down to Features
- Press Select (softkey 1)
- When Call fwd is displayed, use the navigation button (down arrow) to scroll through other options
- When Do Not Disturb is displayed
- Press Select (softkey 1) (Radio button on the symbol will now be displayed)
- Press the Phone button to return to the main screen
- The main screen will display (Do not disturb symbol)
Conference calls
- While on a call the option to the conference will appear above softkey 2
- Press Conf (softkey 2)
- Press NewCall (softkey2)
- Dial number
- Press Call (softkey 1)
- When call is connected, press Join to connect all participants

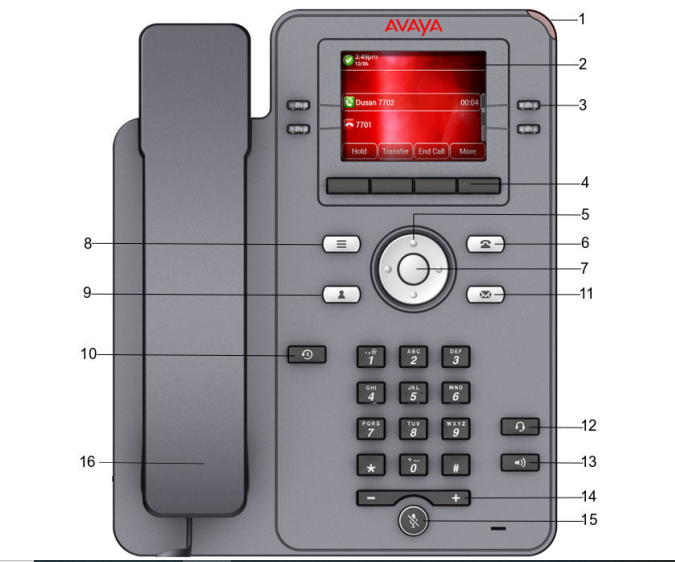
J139 Handset Image

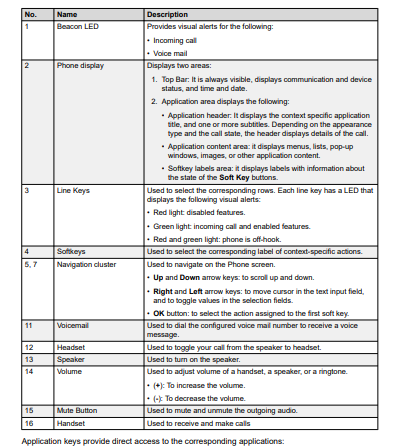
J139 Menu page one

J139 Menu page two
J139 Handset
- Handsets are logged in initially and will remain logged in unless it loses power.
- The login requirement is for security purposes and to allow mobility for future softphone UC functions.
- The password is set initially by the system for the handset and will not change. There is no option for the user to change this password and it will always be in the form of an 8-digit PIN code.
Logging into J139
On the login screen,:
For the Username, enter extension number
For the Password, enter your 8 digit PIN
To Check Voicemail:
Press the Envelope Button
Follow the audio instructions
To Transfer a Call:
When on a call, the option to Transfer will appear on the screen.
To Transfer, press the button under it, enter the extension to receive the call.
Press “Complete” to finish the transfer
Putting the phone on Do Not Disturb/ Sending All Calls to your Voicemail:
Press Menu button (button with 3 horizontal lines)
Use the large circle button to scroll to Features
Press Select
Use the large circle button to scroll down to SAC (Send All Calls)
Press Select, calls should now be routed directly to voicemail,
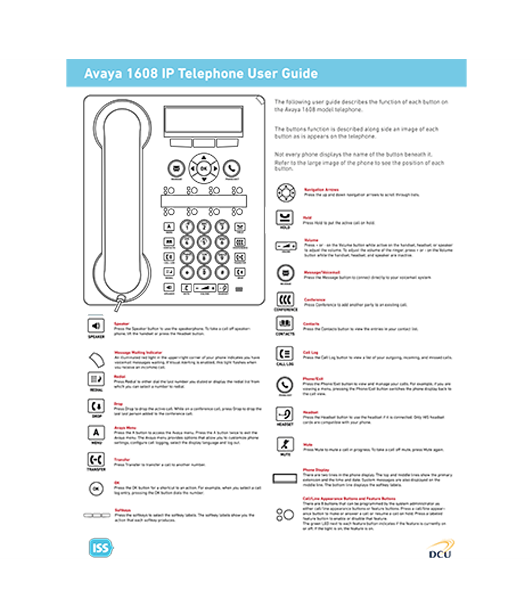
Click on image to download user instruction manual

1608 Handset
1608 Handset Login and Voicemail
- Handsets are logged in initially and will remain logged in unless it loses power.
- The login requirement is for security purposes and to allow mobility for future softphone UC functions.
- The password is set initially by the system for the handset and will not change.
- There is no option for the user to change this password and it will always be in the form of an 8-digit PIN code.
To logout /Login
- Press the Menu button
- Use the navigation keys to scroll through the menu to Log Out and Select
- To Log In at the Ext= prompt enter the extension number and the PIN
Access Voicemail
- Press the message button.
- Follow the voice instructions.
- Your voicemail password is the same as your 8 digit Pin,
- When you access your voicemail initially use your 8 digit Pin, you will be prompted to change it
- It is important to make a note of this new 8 digit password as it is needed each time you access your voicemail
Accessing voicemails remotely
- To access your new voicemail inbox dial - 017009111 and follow the audio instructions
Call/Line appearance buttons (8 small round grey buttons)
#1 - line
#2 - line
#3 – line
#4 - Call Forward - press twice, enter the extension number. Greenlight indicates on Press once to turn off - must be programmed each time does not retain information - can be forwarded internal or to external including mobiles, include 0 for an outside line
#5 - EC500 – Optional feature to sync desk phone with mobile. Contact ISS to enable
#6 - Call Pick Up Group – Contact ISS
#7 - Send All Calls Activated - press once to send all calls to voicemail
Installing and logging into a Softphone
Please note, the softphone client can only be installed from the Company Portal, so it can only be configured on a DCU Windows device, it cannot be installed on a personal device.
Install from Company Portal
Type "Company Portal" in the Search window at the bottom of your screen
Open Company Portal
Click on Apps in the menu at the left
Find and Install Avaya Workplace client
Open the Application
Select "Configure my Account"
Enter your email address in the first window, select Next
On the next window, use your email address for the Username and your DCU password, select Next
Your client is now logged in, please dial 0 for an outside line
- Your unique password is available at the following link
https://phone-password-retrieval.dcu.ie/login
accessed by entering your DCU AD credentials - The pin retrieval page is only accessible from within DCU or by using the DCU VPN when outside of DCU
- The 8 Digit PIN for logging into your phone /account will never change. This 8 digit PIN is used to access your voicemail initially. The system will ask you to change it on your first login.
- If you have forgotten the new voicemail PIN please log a ticket on our system to request it be reverted back to the original 8 digit PIN
- There are 3 types of handset please refer to the handset instructions specific to your handset: see above : J129, J139, 1608 Manual
See Handset type for specific voicemail instructions listed above J129, J139, 1608 Manual
- The 8 Digit PIN for logging into your phone /account will never change. This 8 digit PIN is used to access your voicemail initially. The system will ask you to change it on your first login.
- If you have forgotten the new voicemail PIN please log a ticket on our system to request it be reverted back to the original 8 digit PIN
To access your new voicemail inbox remotely dial -
(01) 7009111 and follow the audio instructions
To setup voicemail to email see:
ISS is responsible for administering the main DCU mobile phone account. They are the point-of-contact between the mobile phone supplier and DCU and provide support in setting up new accounts, transferring on and off the account, facilitating upgrades, etc. Outside of ISS service hours, DCU staff may report a mobile phone lost or stolen to the current service provider.
Setting up a new Mobile Device Account
Setting up a new Mobile phone account
- Please click here to access a list of charges for handsets which are currently available on the account (you will need to log in with your DCU staff login details to access this list). Alternatively, log a call on the On-line servicedesk system and the file will be emailed to you.
- Select the handset that you wish to order.
- log a ticket here, detailing the following:
- User name
- Department
- Full Billing address (including department head if necessary)
- Cost code for payments
- Handset required
- The phone will be ordered and delivered directly to the billing address supplied.
Upgrade procedure
- Please click here to access a list of charges for handsets which are currently available on the account (you will need to log in with your DCU staff login details to access this list). Alternatively, log a call on the On-line service desk system and the file will be emailed to you.
- Select the handset that you wish to order.
- Log a Request ticket, detailing the following:
- User name
- Mobile number
- Handset required
- The phone will be ordered and delivered directly to the billing address supplied.
Payment procedure
On a monthly basis, Vodafone send a spreadsheet to the DCU finance department which contains a total spend for each handset/account.
Finance pays the total to Vodafone from a central account.
Using the details on the spreadsheet, DCU finance uses Agresso to deduct the relevant amount from each individual department to refund the central account.
The user/department head will also receive a paper copy of the invoice on a monthly basis. This is for information purposes only, and no processing should be required if it is correct. It can be used to check that the correct amount was deducted on Agresso.
If there are any problems with it, contact the telephony group for assistance.
Accounts with basic phones can be set up for a period of 1 year. Accounts with smartphones are set up for a minimum of 24 months
Transferring on and off the account
-
- It is possible to both transfer a private number on to the DCU account and to transfer a DCU number off the account.
- To transfer a private number onto or off the DCU account from/to the same network, use the Transfer Form.
- To transfer a private number onto or off the DCU account from/to a different network, use the CAF Form.
- For assistance in completing these forms please log a ticket on the ISS online system.
To configure your device to the Eduroam network please click here
Config DCU Apps on iPhone
DCU Apps Email on iPhone
You can download the official Gmail app for iPhone or iPad by clicking on the image on the right
Once you have installed the Gmail app on your iPhone or iPad:
-
- Open the official Gmail App
- Enter your DCU email address and password
- Login
Follow the same steps to install any of the other apps from the Google Apps offering.
Config DCU Apps on Android
DCU Apps Email on Android
You can download the official Gmail app for Android Device by clicking on the image on the right
Once you have installed the Gmail app on your Android Device
-
- Open the official Gmail App
- Enter your DCU email address and password
- Login
Follow the same steps to install any of the other apps from the Google Apps offering.
When prompted for a username/email address and password, use your DCU username/eMail address and password. (eMail address & password are not the same)
Mobile Device Security
- When using GPRS or internet from your mobile, do not browse untrusted sites or download applications or contents unless you are sure about its trustworthiness.
- Always use those applications that are certified and secure, checking downloaded apps for security certificates.
- Bluetooth Applications should always be in “Switch OFF” mode, when not in use, or try and be on “Invisible Mode” if required on a regular basis.
- Do not ever accept any file from unknown sources via Bluetooth.
- Do not entertain any message, with links to a website. Never click on them, just simply delete them.
- Take heed of these simple tips and tricks and protect your mobile from getting hacked.
Setting Passcode on your iPhone
As with all mobile devices, the minimum protection that ISS recommend would be the setting of your four-digit PIN or Passcode. This protects your phone from unauthorised usage and most importantly prevents unauthorised access to your private information. In the case of the iPhone, a security Passcode is not set by default. To enable this feature please follow these simple steps.
- Click the Home button to bring up the main menu
- Click on Settings
- In the Settings screen click on General
- In the General screen click on Passcode Lock
- This will open the Set Passcode screen. Enter a memorable 4-figure code and re-enter it when prompted
- You will now be at the Passcode Lock screen. You can change when you are prompted to enter the Passcode. The default setting - Immediately - means you will be asked to enter it as soon as you start using the iPhone. But you can change the setting so that the prompt appears after a certain period of use
- Press the Home button to return to the main menu.
Setting the Passcode on your Android mobile phone
- Tap the Apps icon bring you to all of your applications.
- Tap settings.
- Tap Location and Security.
- Here you can choose to “Set up a screen lock”.
- You have a choice of pattern, PIN or password.
- When you set this up you will return to the previous menu.
- Here you can also “Set up a SIM card lock”
- Tap back out of security settings and lock the phone.
- Enter your pattern to unlock the phone.
- After a reboot enter your SIM pin when prompted.
You can find our mobile phone charges details
RingMaster
The telephony services section of ISS is responsible for administering the call charging system for all calls from the University. The system currently in use for this is called Ringmaster.
The Ringmaster system monitors the duration and destination of all outgoing calls. The charging table then calculates the charge for each individual call. This is a basic charge and does not include the VAT and fixed charge. These are added during processing at a later stage by the finance department.
Reports are automatically generated on a monthly basis and sent to the head of each school/unit. This provides a list of the extensions within each school/unit and the basic call charge for each extension. At the same time, a summary is sent to the finance department, they add the Vat and the fixed charge, and use the Agresso system to make inter-departmental transfers for the relevant amount.
If required, it is possible to provide more detailed reports. This can include reports within a set period, detailed reports for a particular extension, lists of extensions included within a particular department, etc.
For more information on any of this, to request a report or to update any of the information on the department lists, please contact us.
If moving offices log out of the handset in your current office and use 'Ext' and PIN to login in the new office
- The school admin/manager can log a ticket with ISS and include the budget code for payment. ISS will submit this budget code to the Finance dept
- A new extension/account can be purchased via ISS at a cost of €220.00 incl vat this includes the Avaya Workstation Softphone
- Extensions and handsets are paid for and remain with the owning dept
- Staff members who move dept will require a new paid for extension/handset from their new dept and a new number


