
AirMedia - Wireless Projection & Collaboration
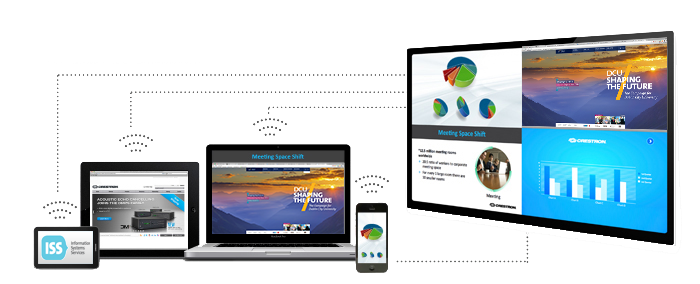
AirMedia is a modern wireless HD presentation system which simplifies and improves classroom presentations and collaboration.
The DCU Teaching and Learning Strategy states:
“ .. We will create a Digital Campus that will underpin the educational experience for our students, both on and off campus, enabling us to equip them to flourish in the 21st century.”
AirMedia is another positive step to achieving our goals of a Digital Campus, to support the most modern teaching and learning methods.
What are the Benefits?
- Wireless Projection
-
-
- No need to use the normal cables (VGA, HDMI) or worry about adapters.
- Connect over the staff wireless network - Eduroam
-
-
- Collaboration
-
-
- Allow students to share their work wirelessly with the class.
- Up to 4 presentations can be viewed simultaneously on the main projection screen.
- Up to 32 people can connect and watch presentations on their own device.
-
-
- Present from any Device
-
-
- Full functionality available for Windows and Macintosh laptops.
-
-
-
- Sharing from IOS (iPhone, iPad) and Android (tablets and phones) also possible
-
-
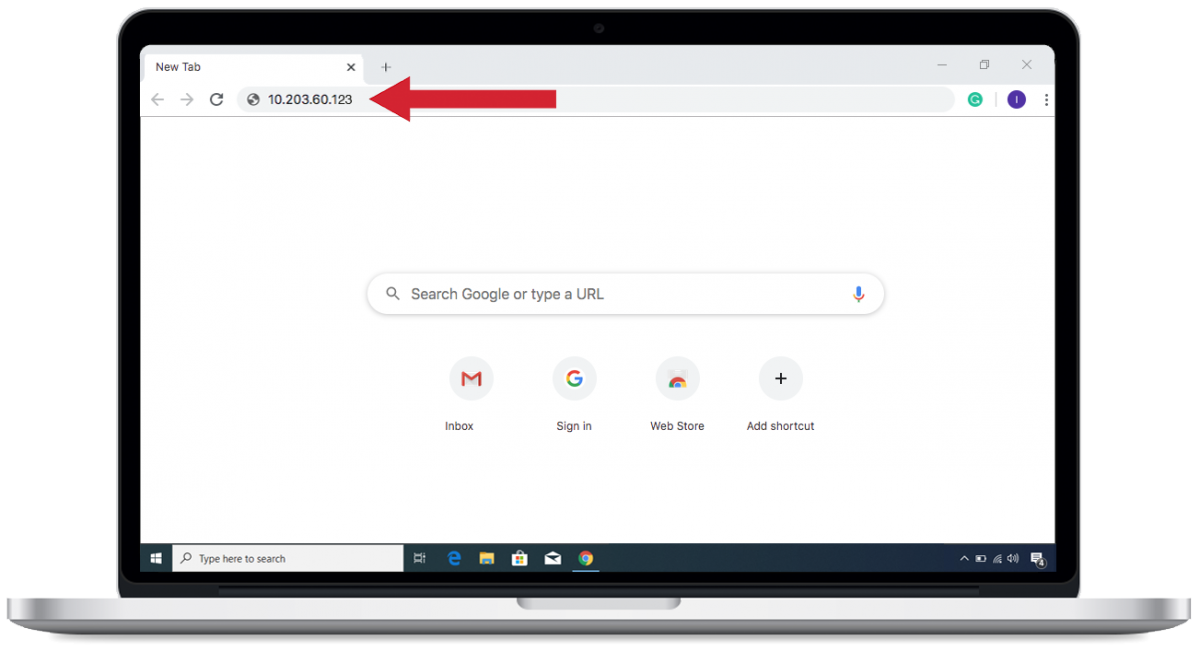
1. Install Airmedia:
-
-
- To begin the installation process, please type the IP number into a Chrome web browser and press enter.
-
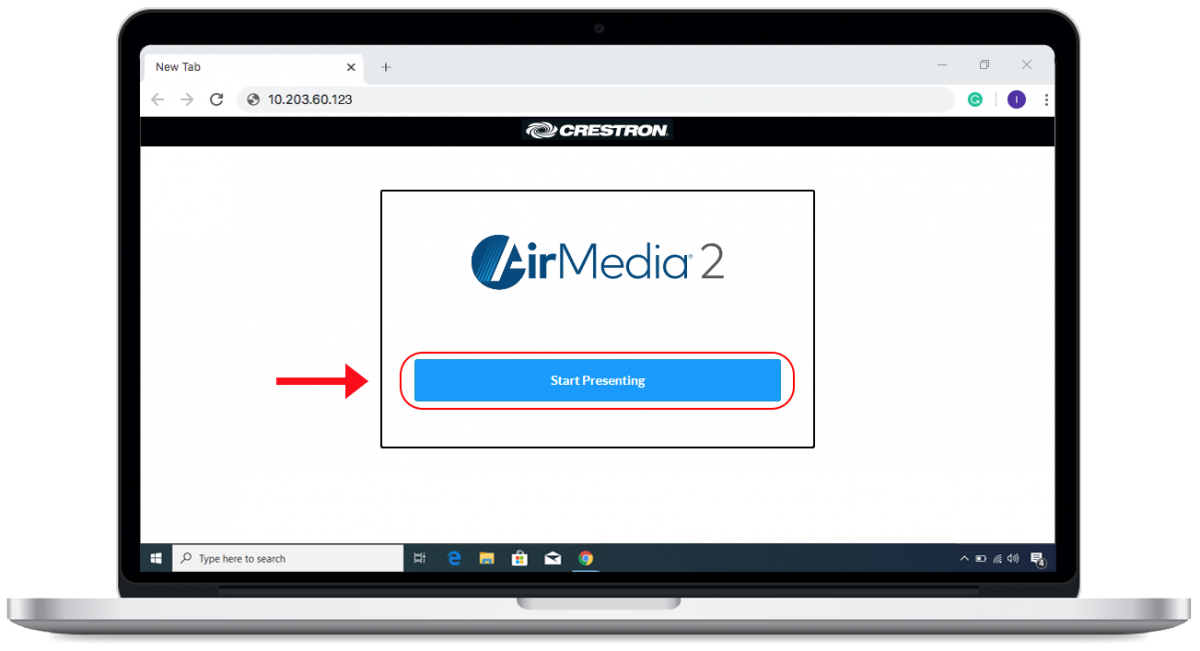
2. Commence Airmedia install process:
-
-
- To begin presenting please click on the start presenting blue button highlighted in red below.
-
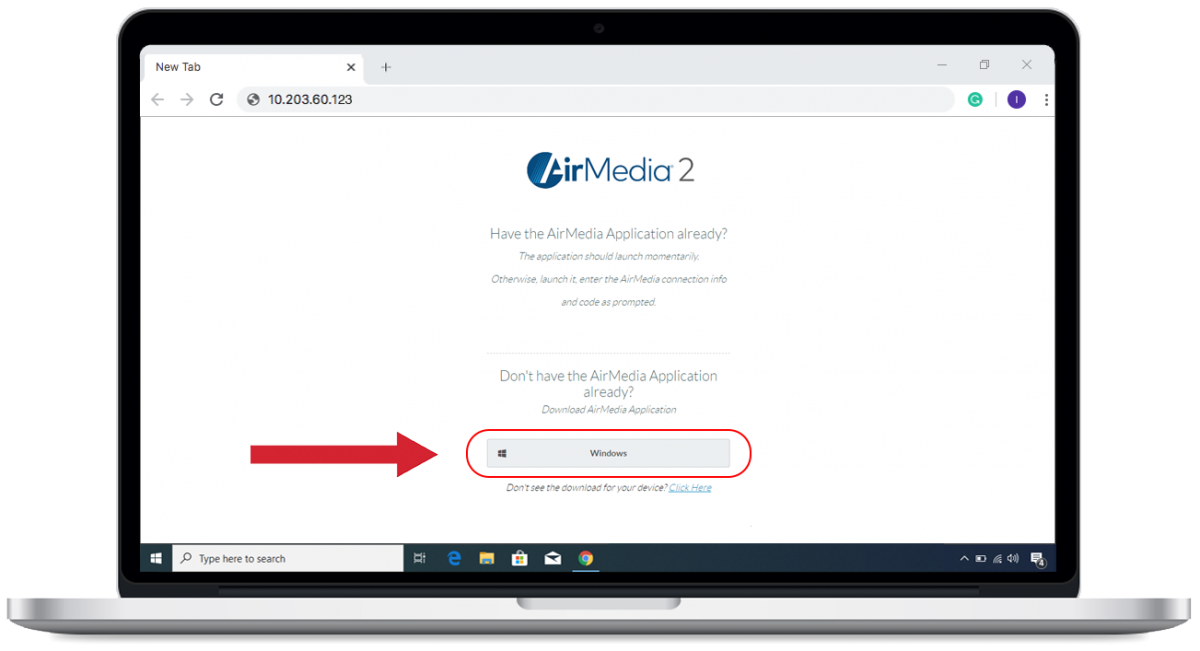
3. Airmedia install process:
-
-
- Please click on the WINDOWS button highlighted in red below.
-
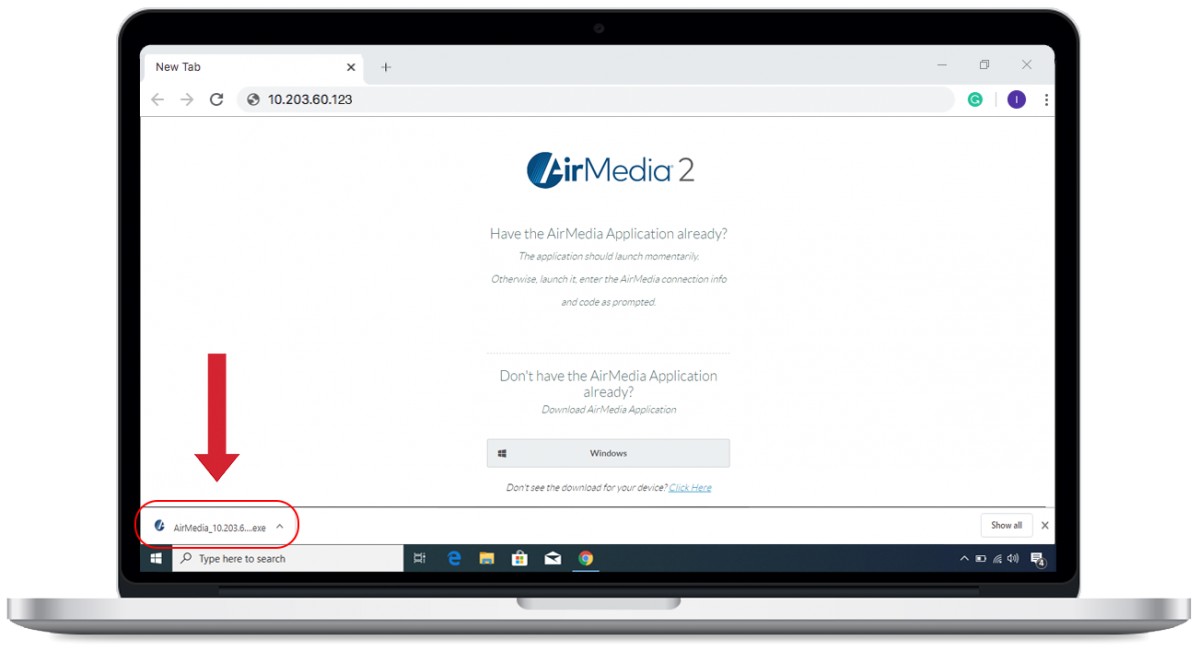
4.Open the downloaded install file:
-
-
- The downloaded install file is located at the bottom left of your screen.
- Double click on the file to commence the install process.
-
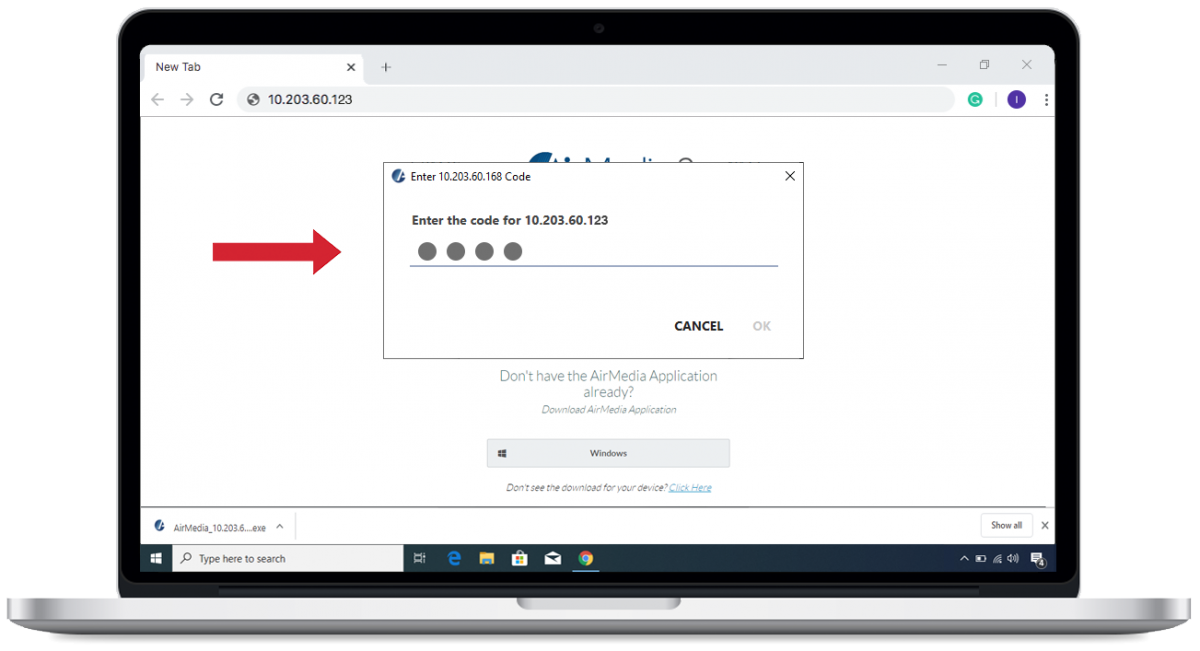
5. Enter the 4 digit code
-
-
- Enter the 4 digit code AirPlay code which is located on the top right hand of the projector screen into the dialogue box as shown in the image below.
-
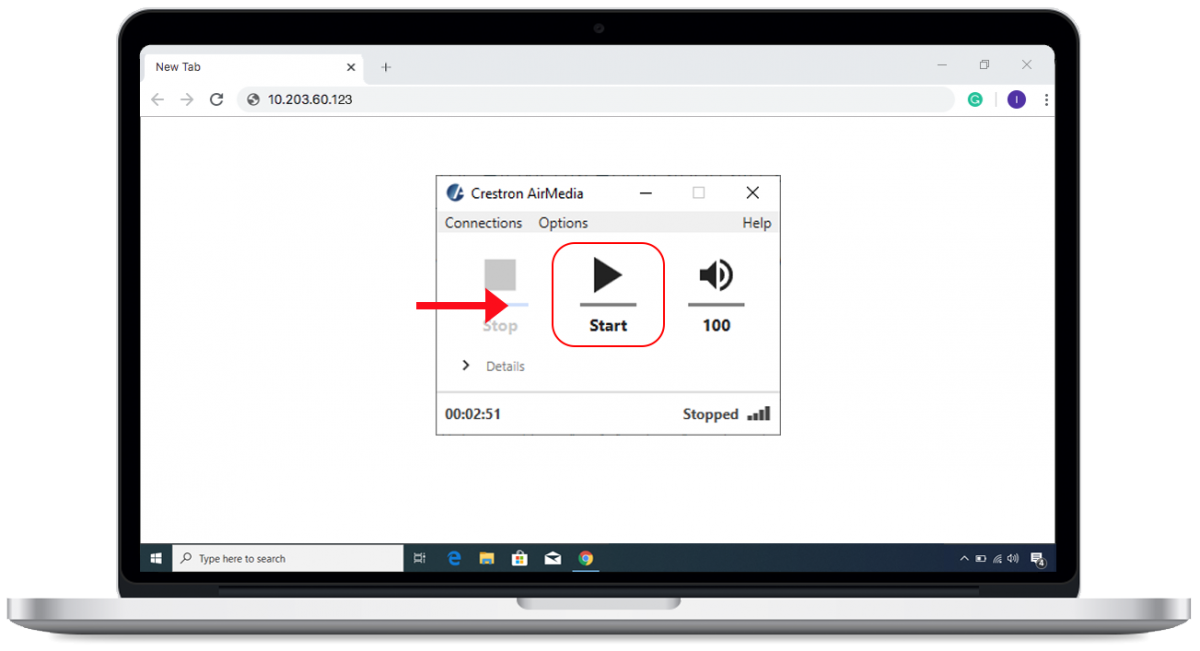
6. Commence presenting:
-
-
- To begin presenting please click on the start button highlighted in red below.
-
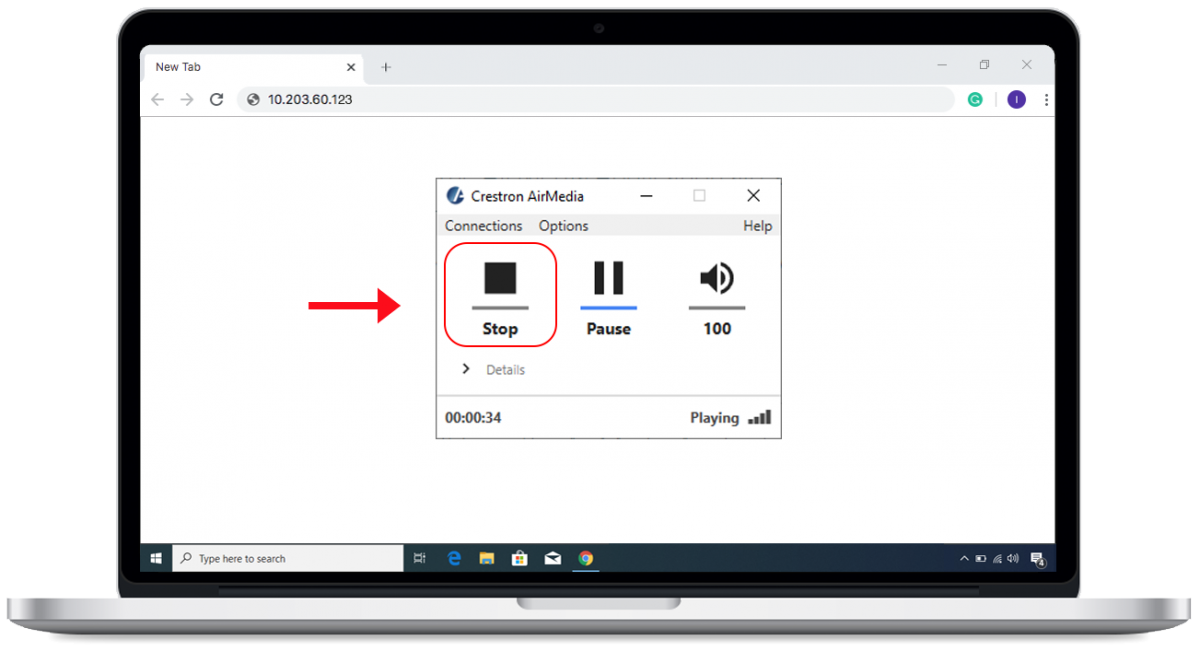
7.Cease presenting:
-
-
- To cease presenting please click on the stop button highlighted in red below.
-
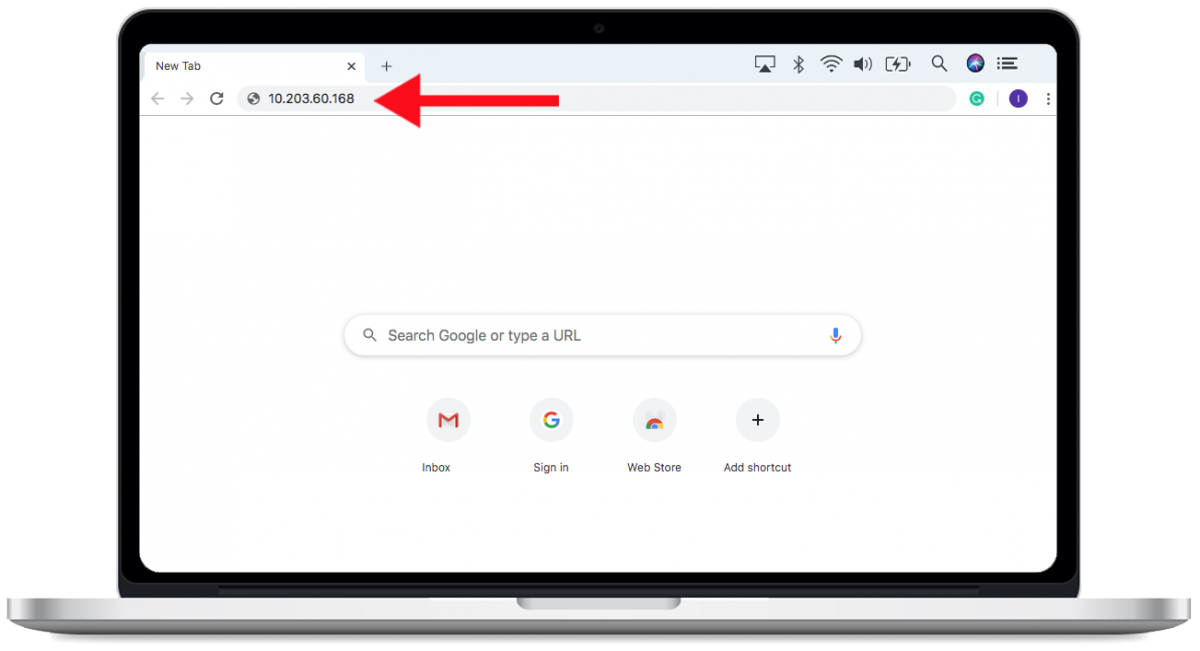
1. Install Airmedia:
-
-
- To begin the installation process, please type the IP number into a Chrome web browser and press enter.
-
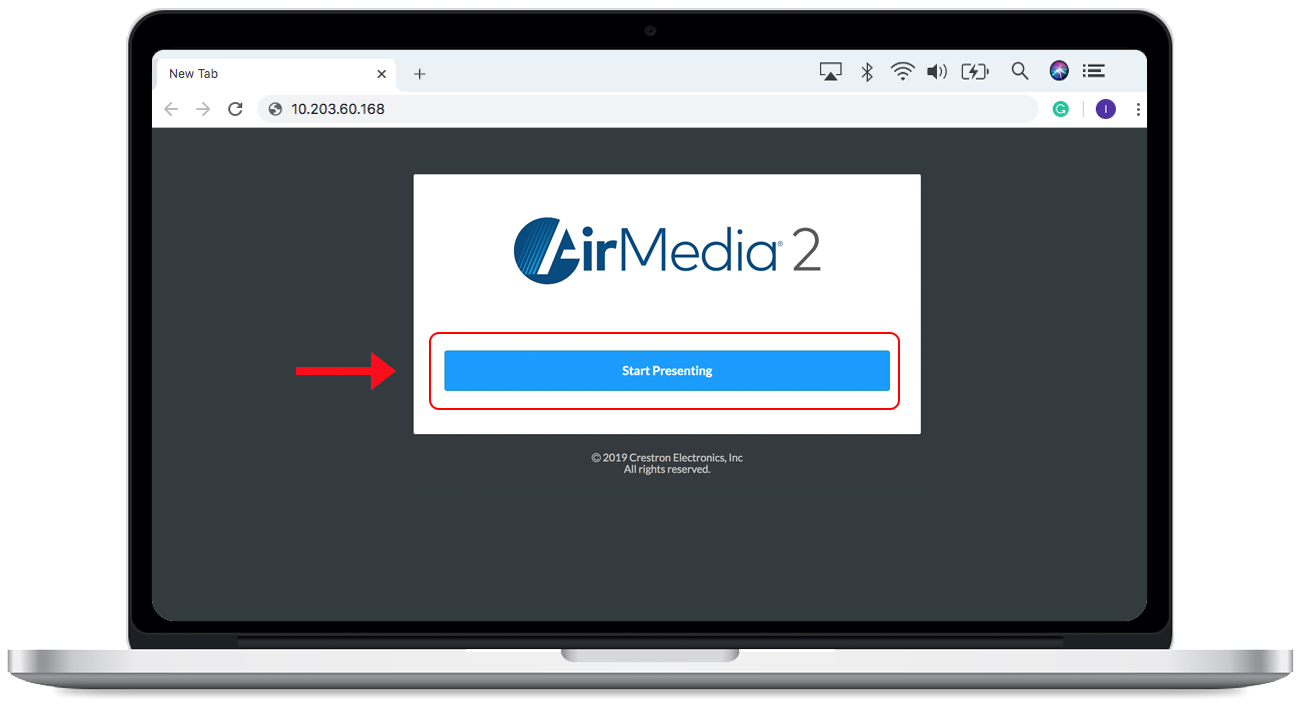
2. Commence Airmedia install process:
-
-
- To begin the Airmedia install process please click on the start presenting blue button highlighted in red below.
-
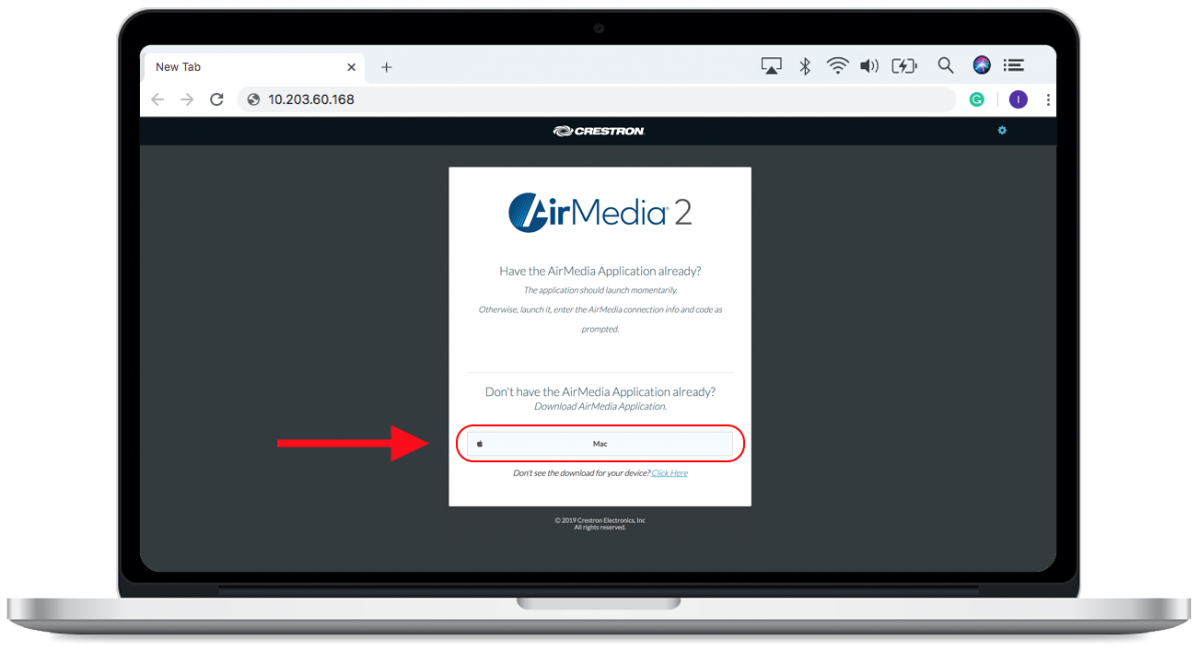
3. Airmedia install process:
-
-
- Please click on the MAC button highlighted in red below.
- This will download an installation file that is located at the bottom left of your screen, see next step.
-
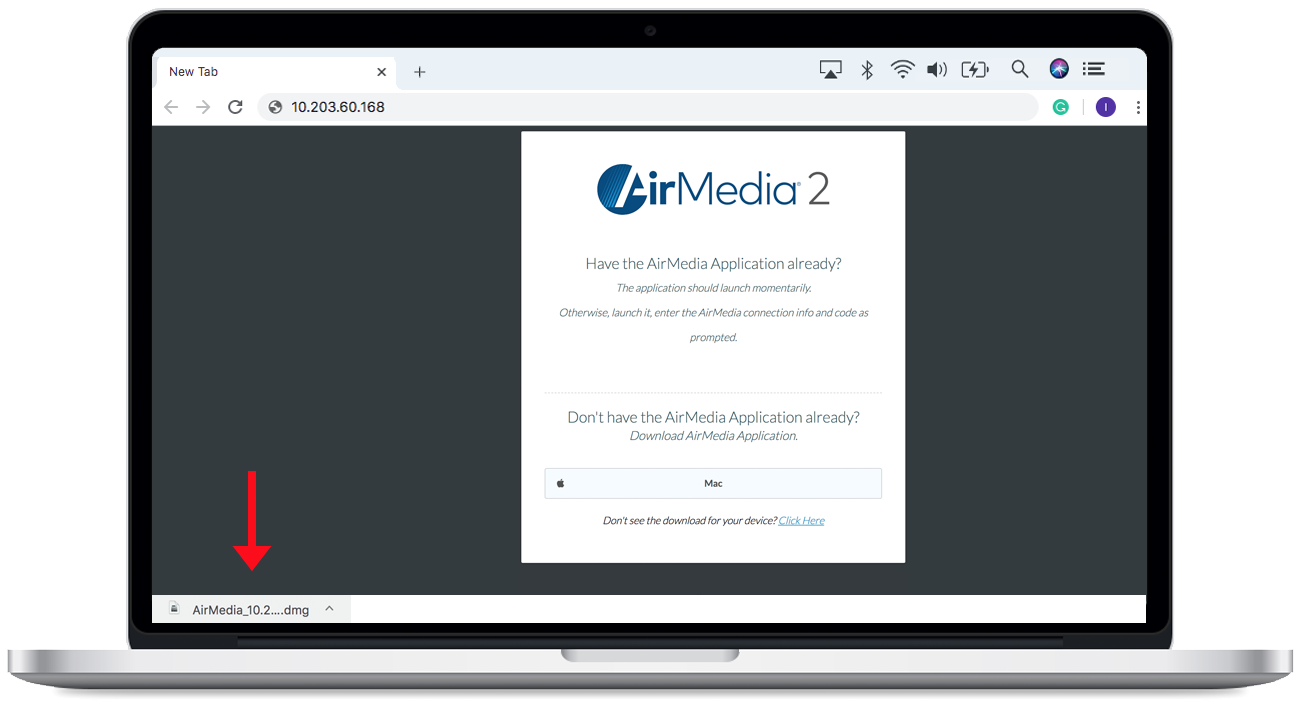
4.Open the downloaded install file:
-
-
- The downloaded install file is located at the bottom left of your screen.
- Double click on the file to commence the install process.
-
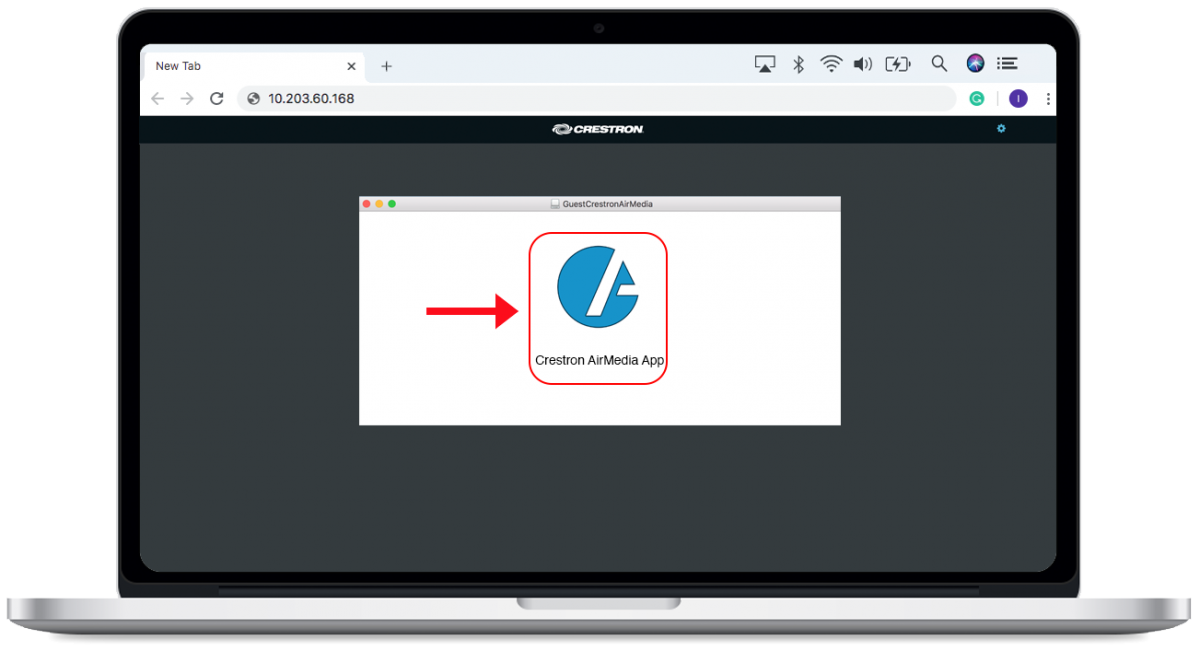
5. Activate Airmedia:
-
-
- Double click on the Crestron Airmedia App icon located in the center of the screen.
-
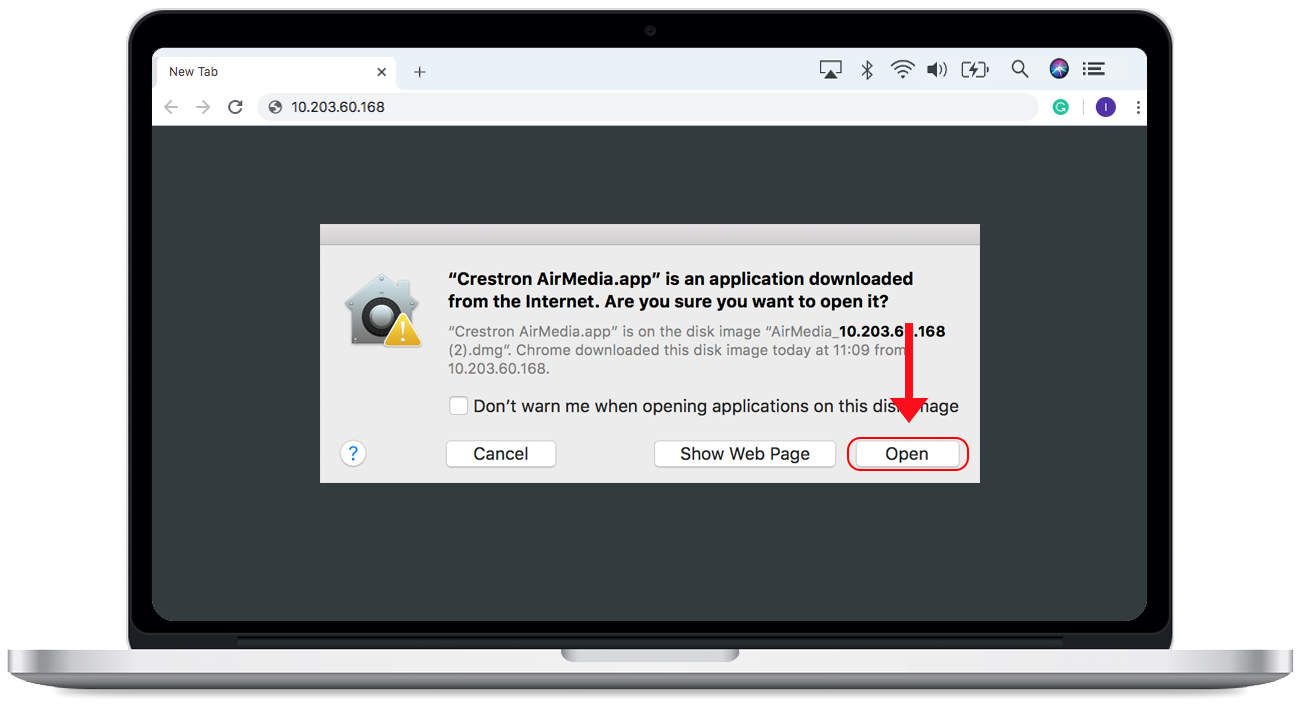
6. Select open to continue:
-
-
- Click on the Open button in the dialogue box to continue.
-
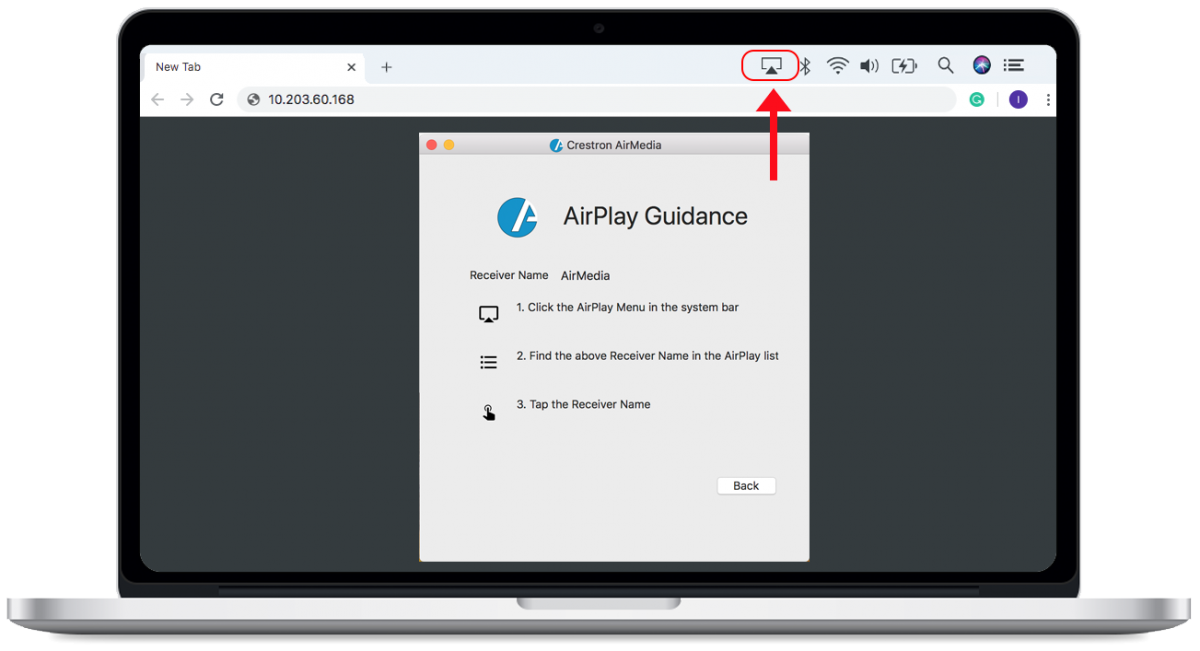
7. Select AirPlay:
-
-
- Click on the AirPlay icon located at the top toolbar at the top of your screen.
-
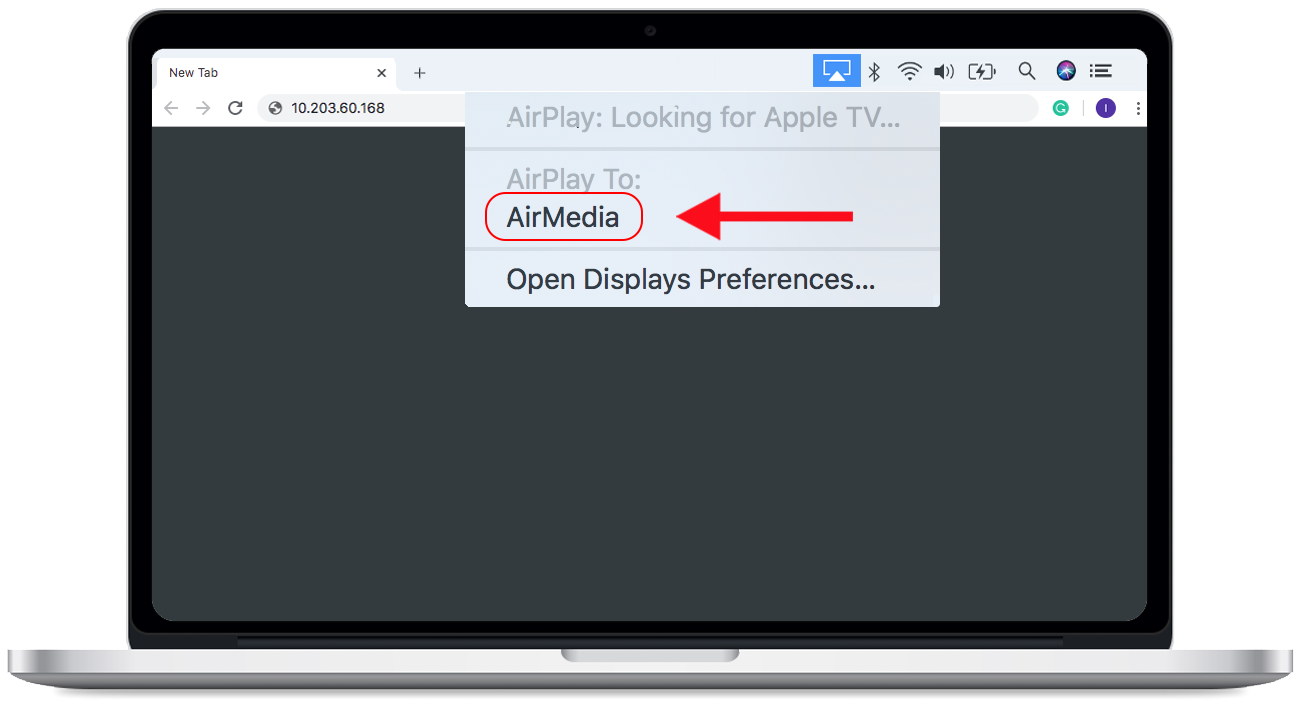
8. Select AirMedia:
-
-
- Click on Airmedia option, see image below to mirror your screen.
-
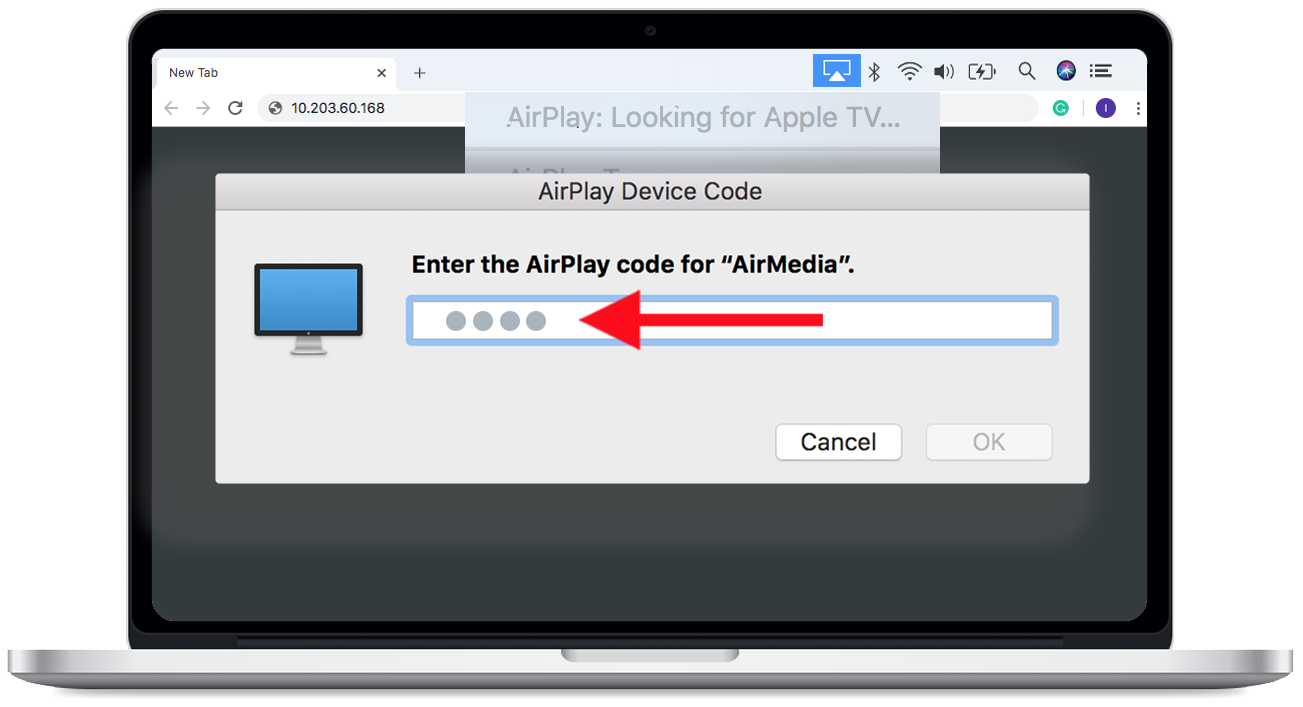
9. Enter the 4 digit code
-
-
- Enter the 4 digit code AirPlay code which is located on the top right hand of the projector screen into the dialogue box as shown in the image below.
-
AirMedia Control Panel
Please ensure you have followed all the instructions on the Install & Launch tab. You will only see this control panel once you have followed those instructions and connected successfully to AirMedia.
- Once connected, the AirMedia will display whatever is currently on your desktop.
- Use the Airmedia control panel to control the presentation:
![]()
- Clicking the Play button selects your device as the presentation source, sending whatever is on the laptop screen to the room display.
- While presenting, it is often necessary to navigate away from your presentation. AirMedia lets you pause the presentation, freezing the current image on the screen so others can continue to view it while you look through your personal files. Once you've located new content and brought it up on your device, simply click Play to resume the presentation.
- When done presenting, click the Stop button to stop displaying your device. To continue presenting, press the Play button once more.
- To Close the application at the end of the presentation please click on the X button, this will disconnect your device from the AirMedia application.
- Click the display additional options icon, highlighted in red below, to access additional options via the popup menu.
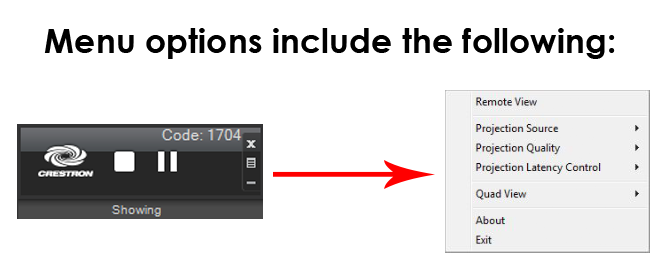
- Remote View - Enables up to 40 people to view the presentation on their laptop/device via the Airmedia application.
- Projection Source (Windows Only) - Allows the user to share a secondary desktop.
- Projection Quality - Uses more bandwidth to improve the quality of the transmitted image.
- Projection Latency Control - Uses more CPU power to reduce the latency of the projected image.
- Quad View - Four devices can be displayed at any one time.
Notes
- Although AirMedia can support up to 32 connected computers for sharing, only four desktops can be displayed at a time in Quad View.
AirMedia
Wireless Projection & Collaboration
